How to Use Chez: From Room Photos to an Interactive 3D Space
TL;DR
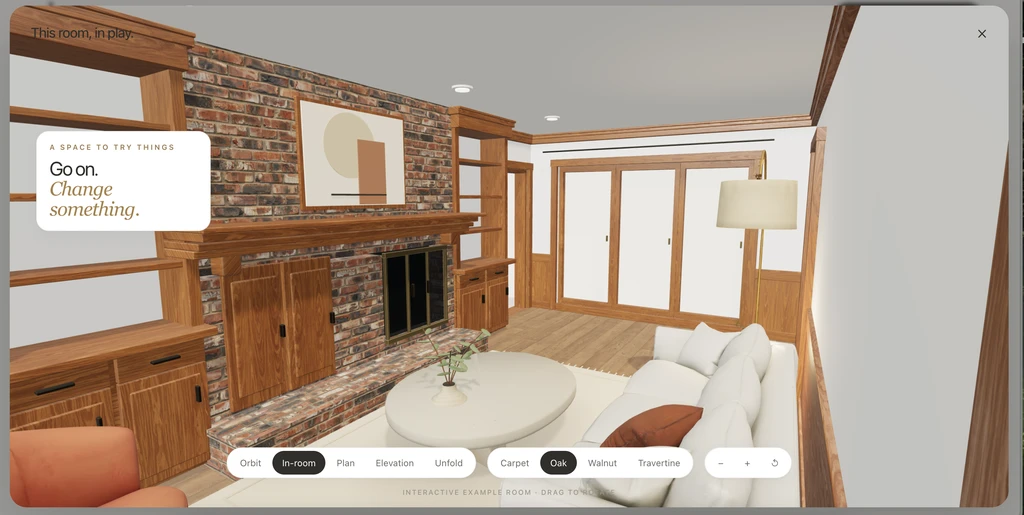
Chez by ReimagineHome lets anyone build a 3D room model from real photographs. Simply upload two or more images, follow on-screen steps, and you’ll be able to wander, redesign, and preview your space in 3D, including floor plans and elevations. Perfect for planning layouts, furnishings, and finishes.
Why Create a 3D Model of Your Room?
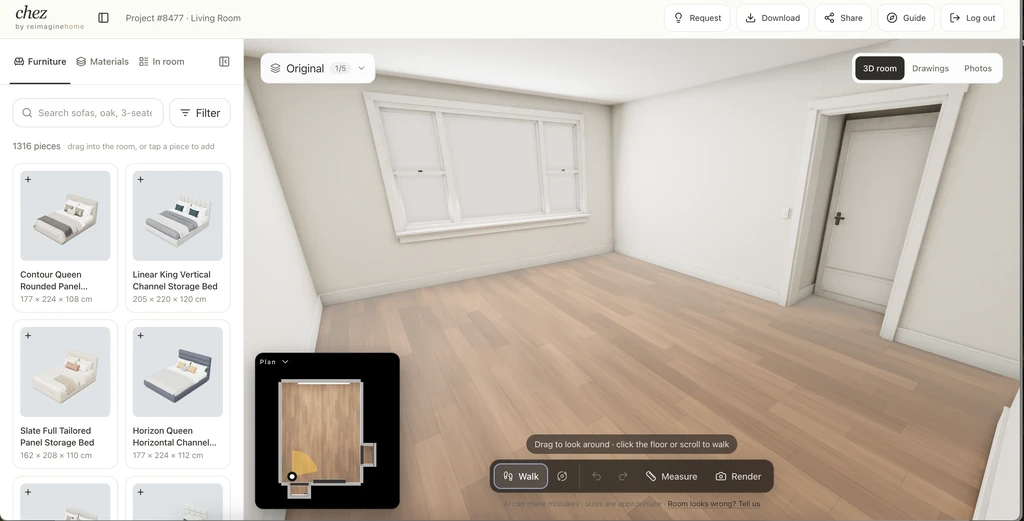
Your generated room is ready to furnish—browse the catalogue and add furniture models to explore different layouts.
A photograph captures one viewpoint. When planning a new layout, you also need to understand how different choices work together across the space.An interactive 3D room lets you examine an arrangement from above and explore it from inside. You can try furniture models, compare room finishes, and review your ideas from several positions.
Chez starts with photographs of your indoor room, giving you a way to explore changes within a representation of your own space.
-
Before You Begin: Prepare Your Room Photos
Chez requires at least two photos of the same indoor room and recommends four to eight overlapping views.
For useful coverage:
- Photograph the room from different corners.
- Keep some of the same features visible between photographs.
- Include a little floor and ceiling.
- Show doors, windows, openings, and built-in features.
- Keep the camera level, around chest height.
- Use bright, sharp original photographs.
Use real room photos. Chez’s upload guidance excludes AI-generated images and 360-degree panoramas. You will also need to sign in to access the studio and furniture catalogue. Review current pricing and any charges shown before proceeding.
-
Open Chez and Upload Your Photos
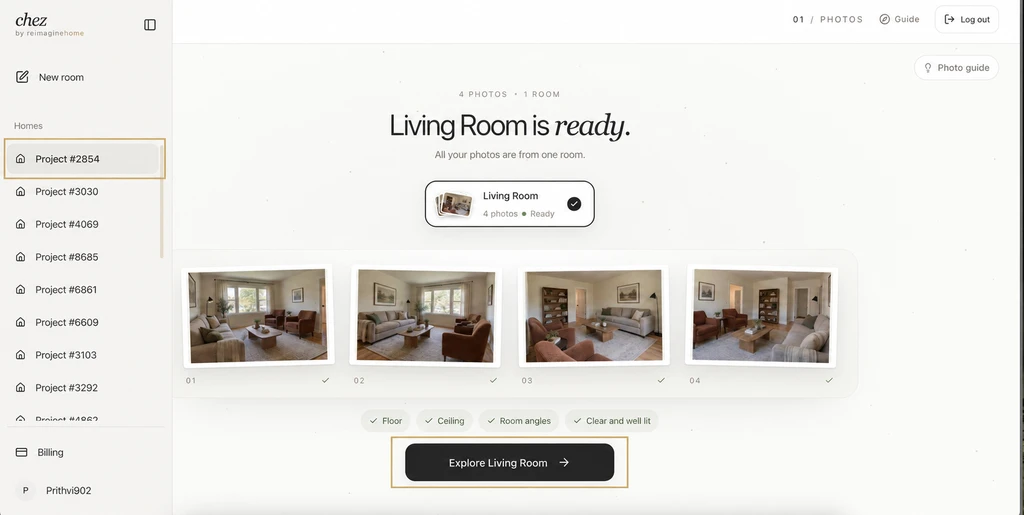
Select your project, review the grouped room photos, and click “Explore Living Room” to continue.
Visit Chez by ReimagineHome and select “Upload room photos.”
Choose “Upload photos” to select your images, or drop them into the upload area.
For your first project, start with one room. Check that your photographs show different angles rather than several nearly identical views. The upload screen also offers “Use a sample room” if you want to explore the starting workflow before choosing your own images.
-
Review the Grouped Room Photos
Chez processes the images and groups them by room.
Review the selected group to confirm that its photographs belong to the same space. The readiness screen shows indicators for:
- Floor.
- Ceiling.
- Room angles.
- Clear and well-lit photos.
Check the overall coverage before continuing. If an important part of the room is missing from your photographs, capture another angle. When the room is ready, select “Explore [room name].” The button label reflects the room identified in your project.
-
Continue Through Analysis and Sign In
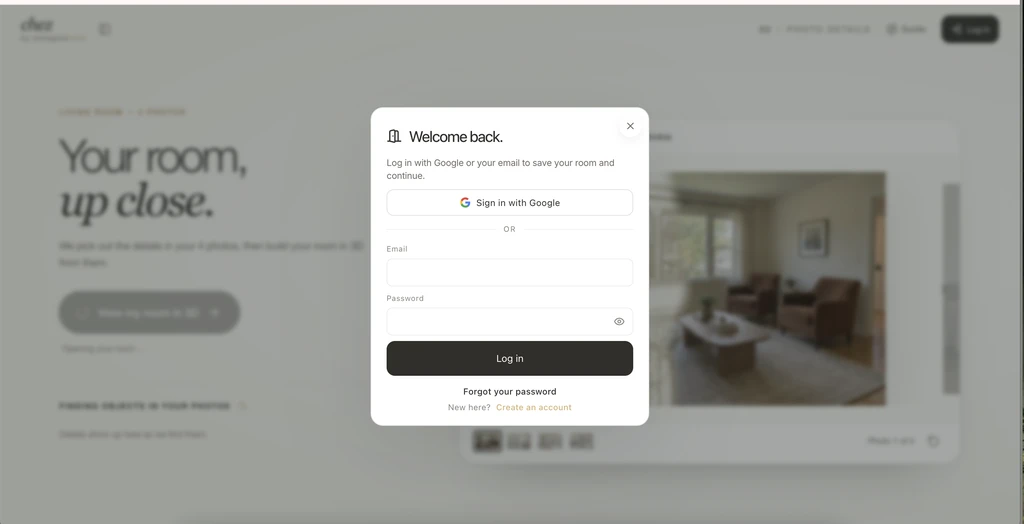
Sign in with Google or email to save your room and continue, or create an account if you’re new to Chez.
Chez analyzes the photographs as you continue toward the studio.
If you are not signed in, follow the account prompts. The sign-in screen offers Google or email login, along with an option to create an account. Continue through the generation and any payment prompts displayed for your project. Review the details before confirming a charge.
Follow the progress shown in the interface rather than expecting a fixed generation time.
-
Build Your Room in 3D
After reviewing your room photos, follow the payment prompts to pay US$1 per room and continue with 3D generation.
Chez uses your uploaded photographs to build the room. Generation typically takes around 6–7 minutes. Follow the progress shown on screen while your scene is being prepared.
While your 3D room is being generated, you can edit your uploaded photos in 2D to explore design ideas.
-
Explore with Orbit and Walk
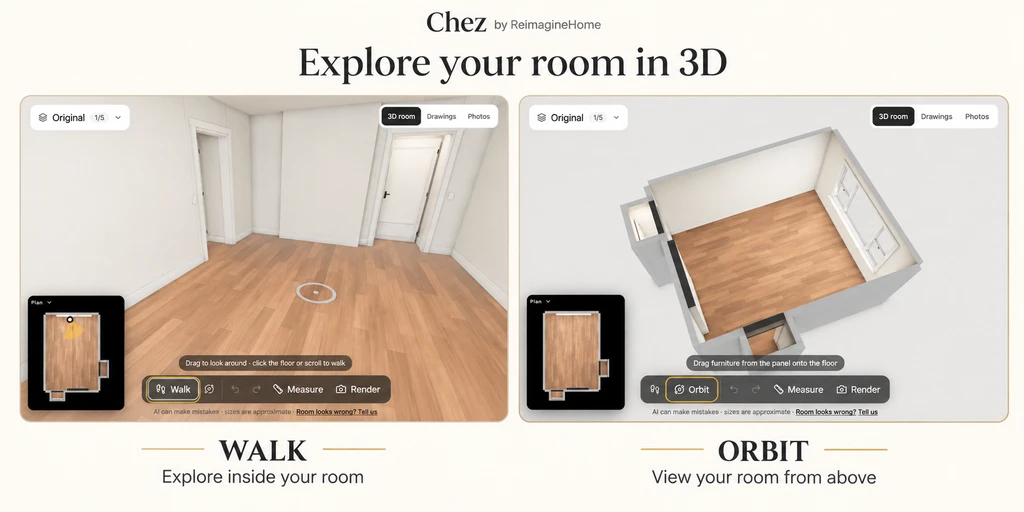
Use Walk to explore inside your 3D room and Orbit to review the layout from above.
Use “Orbit” to examine the room from an overview perspective. This helps you review the room’s shape and the arrangement of furniture across the floor.
Switch to “Walk” to explore from inside the space.
The studio guidance explains that you can:
- Drag to look around.
- Click the floor or scroll to walk.
Move between the two modes as you evaluate your design. Review the arrangement from above, then look at it from the entrance or another useful position inside the room.
-
Open the Floor Plan and Elevations
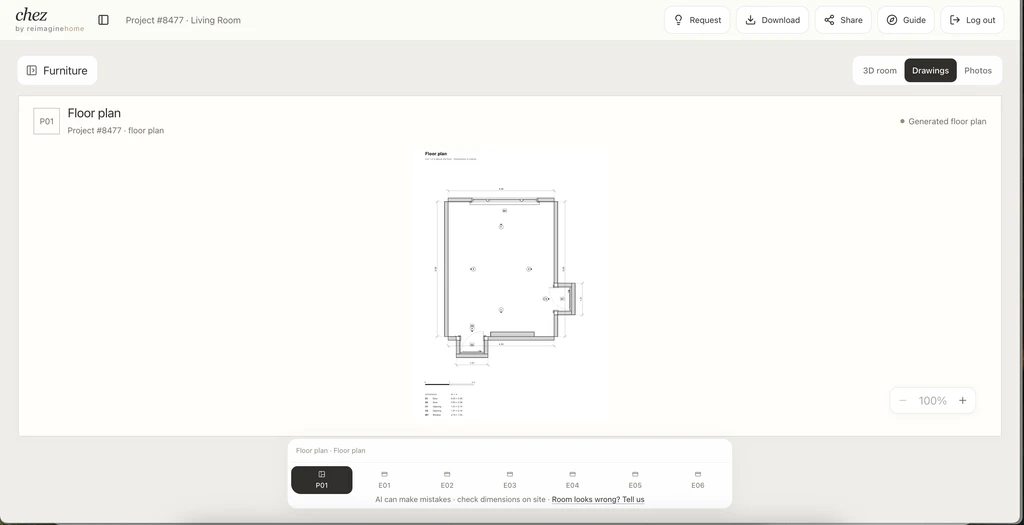
Review your room’s generated floor plan and switch between elevation sheets to explore its layout from different views.
Select “Drawings” to view the generated floor plan and elevation sheets.
The floor plan shows the room from above. It helps you understand the layout and the relationship between walls and openings.
Elevations provide vertical views of different sides of the room.
Select the available drawing tabs to switch between sheets. Use the zoom controls to inspect details.
-
Add Furniture Models
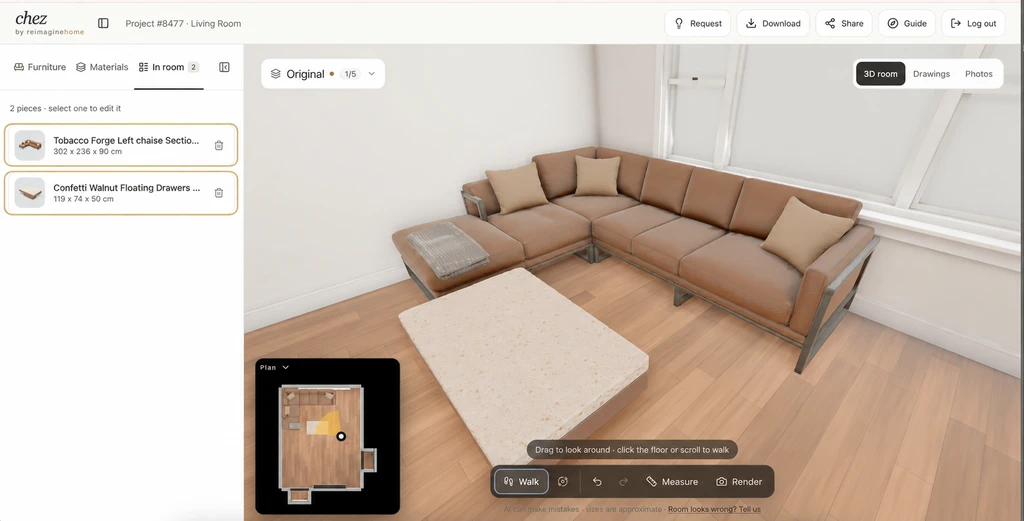
The “In room” panel lists the furniture models added to your scene. Select an entry to edit it or use its delete icon to remove it.
Return to “3D room” and open “Furniture.”
Browse the catalogue or search for a furniture type, such as an accent chair. Use the available filters to narrow your selection.
Select a model or drag it into the room, following the instructions displayed in the studio.
Start with the largest pieces, then develop the arrangement around them. For a living room:
- Add a sofa.
- Introduce a coffee table.
- Position accent chairs.
- Review the arrangement from above.
- Walk through the scene to examine it from inside.
The furniture models support visualization and layout exploration. They are not currently linked to shoppable products. Check the dimensions and specifications of real furniture separately.
-
Preview Wall Colours
Open “Materials” and select the wall you want to change.
Choose “Colours” in the wall controls. Select “This wall” or “All walls” according to the area you want to update, then choose a colour swatch.
The interface also provides a custom colour option.
Keep the flooring and furniture consistent while comparing wall colours. This makes it easier to understand the effect of each choice.
Before purchasing paint, check physical samples in your room’s lighting.
-
Compare Flooring Materials and Textures
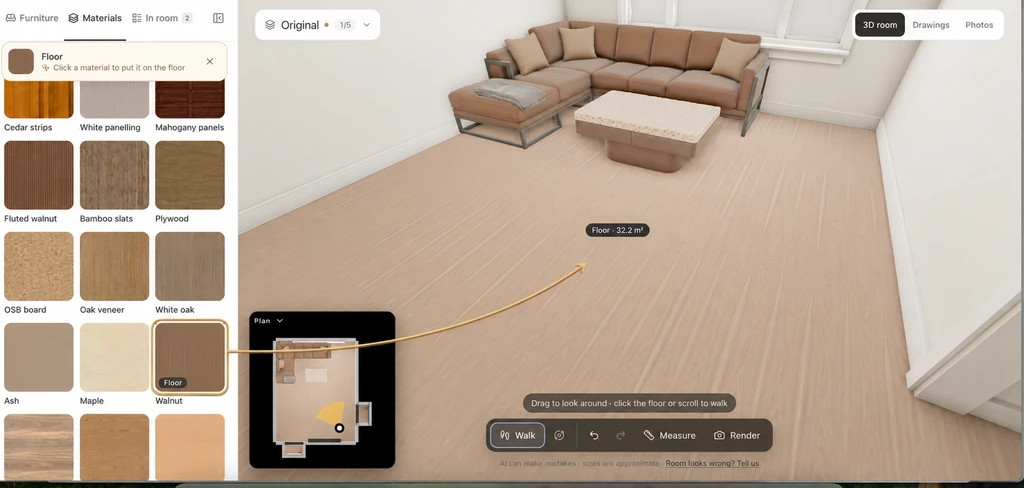
Select a floor material to preview its texture across your 3D room.
Select the floor to open its material choices.
The panel includes different finishes and patterns, such as oak, pine, walnut, parquet, and grey-washed planks.
Choose a material to preview it in the room. Compare a few options while keeping the wall colour unchanged, then switch to Walk mode to examine the combination from inside.
Consider:
- How much contrast the floor creates.
- How the pattern looks across the room.
- How the finish works with the furniture and walls.
These controls apply to room surfaces, including walls and flooring. Furniture texture editing is not part of this workflow.
-
Explore Photo Editing
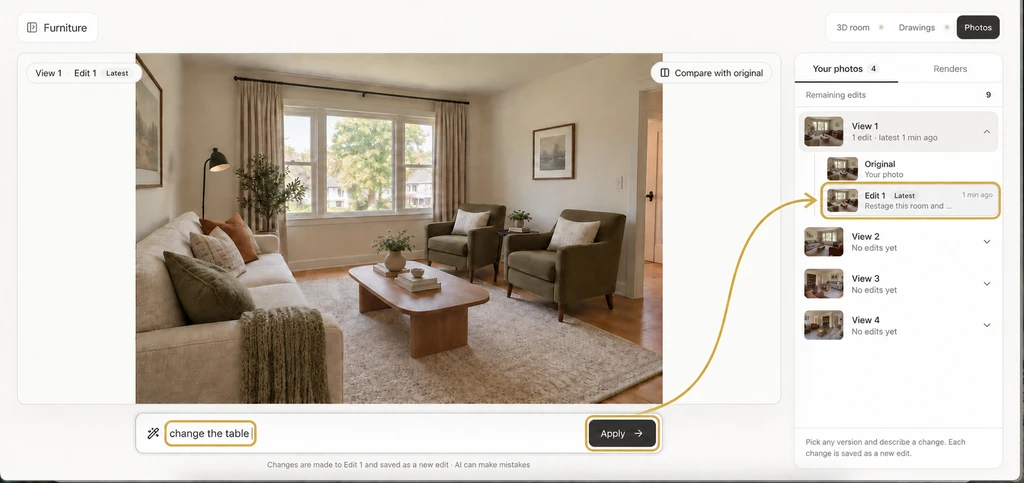
Enter a change and click Apply to generate a new photo edit, then review saved versions in the sidebar.
Chez also supports editing your uploaded room photographs.
Open “Photos” and follow the editing controls available for your project.
Photo editing lets you explore a visual idea from a particular camera angle. The 3D scene lets you examine furniture arrangements and room finishes from multiple positions.
Use the view that best supports the decision you are making.
-
Review Sharing and Download Options
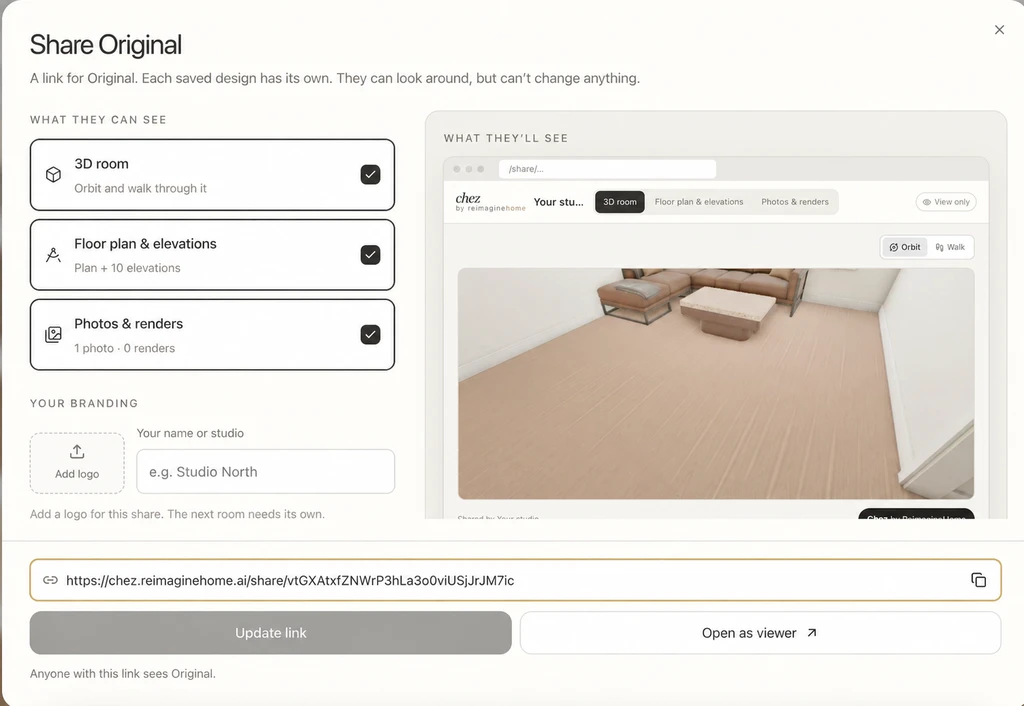
Copy your room’s share link so others can explore the selected design and drawings in view-only mode.
Before sharing or downloading, review the furniture arrangement, room finishes.
Open “Share” or “Download” to inspect the options available for your project.
Check the selected design, included content, and available file formats before completing the action.
Sharing can help you discuss ideas with a partner, designer, or collaborator. Explain which choices are still being explored and which measurements need verification.
-
Common Mistakes to Avoid
- Taking every photo from one position: Capture overlapping views from different corners.
- Missing important room features: Include doors, windows, and connecting openings where possible.
- Using unsuitable images: Follow the guidance to use real indoor photographs rather than AI-generated images or 360-degree panoramas.
- Changing everything at once: Compare wall colours and flooring separately before reviewing the combination.
- Treating estimated dimensions as exact: Measure the physical room and check real product specifications.
Frequently Asked Questions
- How many photos do I need to create a 3D room with Chez?
You need a minimum of two real room photographs, though four to eight overlapping pictures from different corners ensure a more accurate 3D model. - Do my photos need to be empty rooms?
No. Chez works with furnished room images as well. It focuses on capturing the space’s layout, not the specific furniture present in your pictures. - Can I buy furniture shown in the Chez catalogue?
Not yet. Furniture models in Chez are for visualization and layout planning only and aren’t currently linked to live shopping. - Are the generated dimensions and floor plans exact?
No. Dimensions are best estimates based on your photographs. Always measure your actual space before ordering furniture or materials. - What happens if my photos miss a part of the room?
Chez fills in missing areas with inferred geometry. For results closest to reality, capture as much of the room from different angles as possible.
Start with Photos. Explore Your Room in 3D
Prepare clear, overlapping photographs, review the room grouping, and inspect your generated scene. Then explore furniture arrangements, wall colours, and flooring from different perspectives.
With Chez by ReimagineHome, your room photos become a starting point for interactive design exploration.